

Specifying handcrafted copper or brass requires a different approach from selecting a standardized surface.
With stone, tile or manufactured panels, the specification often begins with a product code, a fixed finish and an established set of dimensions. Custom metalwork is different. Material, geometry, surface texture, patina, construction and installation conditions influence one another throughout the project.
For architects and interior designers, that means the metal should be considered as part of the architectural specification—not simply as a decorative finish selected near the end of the design process.
The earlier the design team and fabricator begin exchanging information, the easier it becomes to translate design intent into something that can be fabricated accurately—whether the project calls for the warmth of copper, the golden character of brass, or a combination of custom metal elements.
1. Start With Design Intent, Not Just a Material Name
“Copper” or “brass” alone is not a complete specification.
Before defining dimensions and construction, it helps to understand what role the metal is intended to play in the space.
Is it:
- a focal bar surface?
- a quiet architectural panel?
- a countertop?
- a custom sink?
- a tabletop?
- furniture?
- wall cladding?
- a repeated hospitality element?
- a small architectural detail?
That distinction changes almost every decision that follows.
Copper and Brass Create Different Material Characters
Copper generally introduces warmer red and brown tones and can develop significant tonal variation over time. It can work as a strong material statement in sinks, countertops, bar surfaces and architectural elements.
Brass introduces a more golden character that can feel luminous or restrained depending on texture and finish. It may be considered for furniture surfaces, counters, panels and details where the design calls for a different relationship with wood, stone, hardware and lighting.
Copper and brass are related materials, but they are not interchangeable design choices. Each should be evaluated for its intended application, surface texture, finish direction and relationship to the surrounding interior.
Consider the complete material palette:
metal + stone + wood + cabinetry + hardware + lighting + surrounding finishes
A finish that appears subtle when viewed alone may become much more prominent beside pale stone or under warm directional lighting.
SPECIFIER NOTE
Avoid specifying only “copper” or “brass.”
For either metal, define the intended character:
- smooth or hammered;
- light, medium or dark tonal direction;
- living or protected finish;
- subtle or pronounced variation;
- modern, aged, warm or architectural appearance.
This gives the workshop a much clearer starting point.
2. Turn the Concept Into a Buildable Specification
Once the visual direction is established, the project needs to move from concept into fabrication information.
The objective is not to eliminate craftsmanship or natural material variation. It is to define enough information that the design team and workshop are working toward the same result.
What Should Be Defined?
For most custom copper or brass elements, the specification should address:
| Define | Why it matters |
|---|---|
| Overall dimensions | Length, width, height and relevant radii. |
| Material | Identify copper, brass or another agreed metal, and confirm which material is intended for each application. |
| Surface texture | Smooth, hammered or another project-specific treatment. |
| Finish / patina | Specify the finish direction for the selected metal, including desired tonal variation and living or protected behavior. |
| Thickness or gauge | Where relevant to the product and construction. |
| Edge conditions | Straight, rounded, folded, decorative or project-specific. |
| Corner conditions | Square corners, specified radii or irregular geometry. |
| Openings and cut-outs | For sinks, plumbing, equipment, fixtures or other adjacent elements. |
| Intended application | Countertop, bar, cladding, sink, tabletop, panel, furniture or architectural detail. |
| Installation conditions | What supports the piece, how it connects and what other trades interact with it. |
| Quantity | One unique element or a repeated series. |
THE KEY QUESTION
What information will allow the workshop to understand not only what the piece should look like, but how it must work within the project?
That distinction is especially important for custom architectural metalwork.
3. Drawings, Shop Drawings & Approval Before Fabrication
Architect or designer drawings are usually the starting point—not the end of the fabrication process.
Drawings communicate design intent, overall dimensions and relationships with the surrounding architecture. The fabricator can then review those documents from the perspective of material behavior, construction and feasibility. The choice between copper and brass should also be clear in the drawings or project specification, especially when different metals appear in the same space.
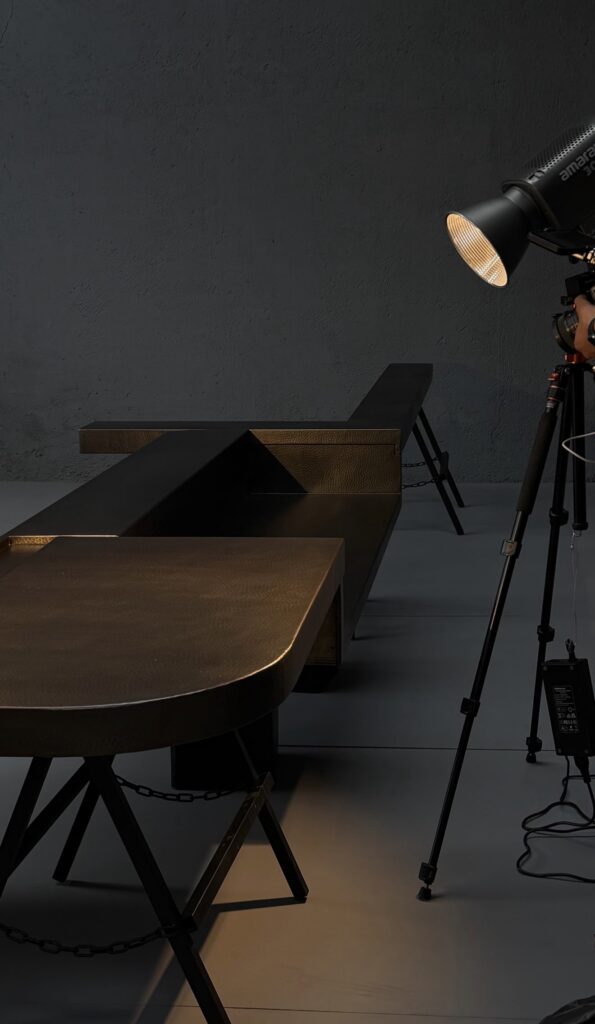
A Typical Coordination Sequence
01
Design drawings
The architect or designer communicates geometry, dimensions and intent.
02
Fabrication review
The workshop reviews feasibility, material behavior, seams, edges, construction and critical dimensions.
03
Detail resolution
Questions or conflicts are resolved before production begins.
04
Shop drawing or fabrication documentation
Critical dimensions and construction details are documented for review when appropriate.
05
Approval
The project team confirms the relevant details before the piece enters production.
This step is particularly valuable when the work includes:
- complicated geometries;
- plumbing openings;
- unusual corner conditions;
- multiple connected pieces;
- repeated components;
- large commercial surfaces;
- interfaces with cabinetry or stone.
The purpose of drawing review is simple:
Reduce assumptions before those assumptions become expensive fabrication or installation problems.
4. Specify an Acceptable Finish Range — Not a Perfect Color Match
This is one of the most important distinctions when working with handcrafted copper and brass.
A hand-applied copper patina or brass finish should not be approached like a printed color or industrial paint code. Copper begins with warmer reddish tones, while brass has a more golden base; texture, finish treatment and exposure can alter the final appearance of either material.
Small differences in material, preparation, application, texture, oxidation, lighting and surrounding materials can influence how the finished metal appears.
For this reason, the goal should be to establish an acceptable finish direction and tonal range for each specified metal, rather than expecting every handcrafted copper or brass surface to reproduce one digital reference exactly.
PHYSICAL SAMPLES MATTER
Screens are useful for choosing a direction. They are less reliable for final finish approval.
When finish accuracy is particularly important, a physical reference allows the project team to evaluate:
- texture;
- reflectivity;
- tonal range;
- hammering;
- interaction with natural light;
- interaction with artificial light;
- relationship to adjacent finishes.
A copper or brass sample should also be viewed beside the actual stone, wood, cabinetry or hardware whenever possible. When both metals are being used, their finish directions should be evaluated together under the project lighting.
IMPORTANT
Sample approval establishes a visual direction—not a promise of industrial color uniformity.
Natural variation is part of handcrafted copper and brass, but the approved finish direction should be evaluated for each metal rather than assuming one sample defines both.
For larger projects, what matters is controlling that variation sufficiently for pieces made from the same material to read as a coherent family. If copper and brass are used together, the intended contrast between them should be part of the approved design direction.
For more about copper specifically, see our guide to copper patina and living finishes. For a brass specification, the relevant finish sample and approval criteria should be discussed with the workshop.
5. Coordinate Metalwork With the Surrounding Trades
Custom metal surfaces rarely exist independently.
They may interact directly with cabinetry, millwork, stone, structural bases, plumbing, appliances, countertops, wall systems, adjacent metal panels, lighting and installation hardware.
This makes trade coordination one of the most important parts of the specification process.
Questions to Resolve Before Fabrication
| Coordination question | Why it matters |
|---|---|
| Who provides the substrate? | Clarifies responsibility for the supporting construction. |
| Who confirms field dimensions? | Defines who verifies built conditions before fabrication. |
| Has the cabinetry already been installed? | Determines whether final measurements can be taken from completed work. |
| Are plumbing locations final? | Avoids conflicts with sinks, drains, fixtures and equipment. |
| Are adjacent surfaces still subject to change? | Identifies dimensions that may not yet be reliable. |
| Who is responsible for installation? | Clarifies coordination and mounting requirements. |
| How will the metal be attached? | Influences substrate, fasteners and detailing. |
| What tolerances exist between materials? | Helps coordinate metal with stone, millwork and adjacent components. |
A beautifully fabricated piece can still create problems on site if the dimensions it was built around no longer correspond to the finished cabinetry or surrounding construction.
FIELD DIMENSIONS
Whenever dimensions depend on built conditions, final measurements should be confirmed at the appropriate point in the construction sequence.
This is particularly important for:
sinks + countertops + cabinetry + large bar surfaces + cladding + connected architectural elements.
6. Seams, Tolerances & Large-Scale Surfaces
Size changes fabrication strategy.
A residential tabletop or countertop may be practical as one individual piece.
A large restaurant bar, hospitality package or architectural installation—whether fabricated in copper or brass—may need to be divided into several sections.
That decision should happen intentionally.
Plan Seams Before Fabrication
Seams can be coordinated around:
- changes in geometry;
- cabinetry breaks;
- structural supports;
- equipment locations;
- natural divisions in the design;
- transportation constraints;
- building access.
A seam that is incorporated into the design is very different from one introduced at the end because the finished piece cannot be transported into the building.
HANDCRAFTED DOES NOT MEAN UNCONTROLLED
Custom metalwork includes natural variation, but professional fabrication still requires control.
Design teams should establish expectations around:
- critical dimensions;
- flatness where function requires it;
- edge alignment;
- relationships between repeated pieces;
- seam positioning;
- acceptable variation in texture;
- acceptable variation in finish.
The goal is not factory uniformity.
The goal is controlled consistency.
PROJECT EXAMPLE
Sierra Restaurant
53 individual surfaces · five-piece bar assembly · 20 large architectural panels
For the Sierra Restaurant project, Monte Grande developed copper surfaces across dining areas, service stations, bar elements and architectural panels. While Sierra is a copper project, its lessons in dimensional coordination, finish consistency and multi-piece fabrication are relevant to custom brass installations as well.
The project involved dozens of independently fabricated components while maintaining a consistent hammered character and controlled patina.
That kind of project illustrates why large-scale custom metalwork must be approached as a coordinated system of pieces, not as a collection of unrelated products.
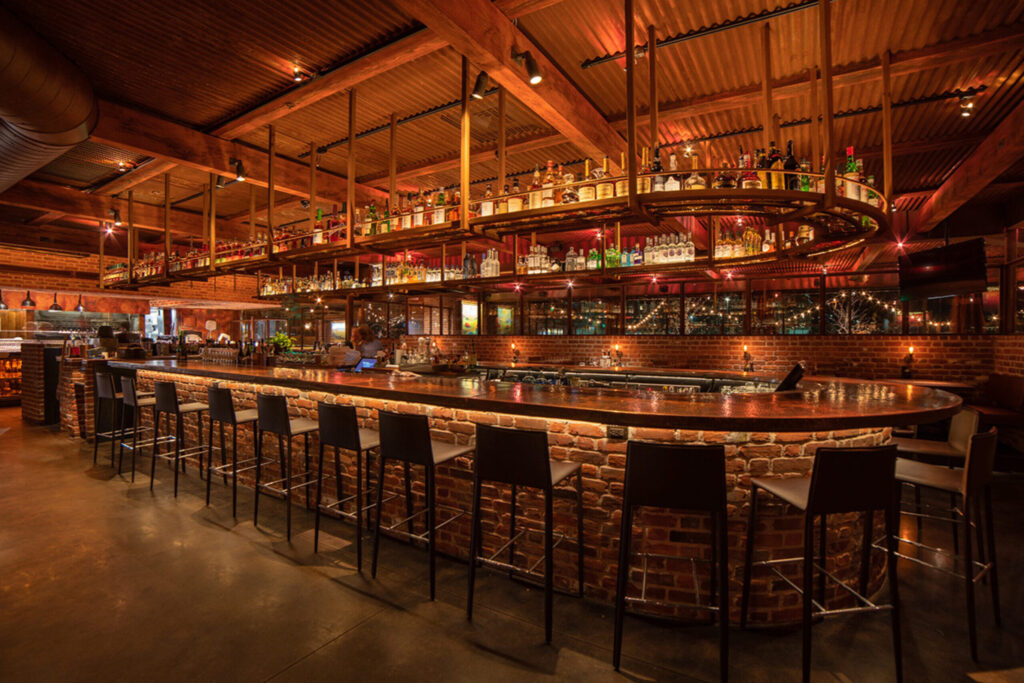
One project. Multiple independently fabricated pieces. One consistent material language.
7. Samples, Mock-Ups & Finish Approval
Not every project requires the same approval process. The scale, finish complexity and choice of copper or brass influence how much sampling and review is appropriate.
For a single residential piece, an approved finish reference may provide enough direction.
For a large hospitality or commercial project, the risk associated with repeating an unapproved finish across dozens of components is significantly higher.
When a Sample May Be Enough
A physical sample can be appropriate when:
- geometry is straightforward;
- finish is the primary variable;
- the quantity is limited;
- construction has already been resolved.
When a Mock-Up or Prototype May Be Worth Considering
A larger representative piece may make sense when:
- the project contains unusual geometry;
- texture is critical;
- seam conditions need evaluation;
- edge treatment is complex;
- several pieces must visually match;
- the material interacts with another custom system;
- project scale makes late changes expensive.
APPROVAL PRINCIPLE
The larger the repetition, the more valuable early approval becomes.
A finish decision applied to one piece is relatively easy to adjust.
The same decision applied across an entire restaurant, hotel or multi-piece package is not.
8. Plan Fabrication Into the Project Schedule
Custom metalwork should not be scheduled like an off-the-shelf product.
The total timeline may include several distinct stages:
01
Inquiry / quote
Initial scope, application and project requirements are discussed.
02
Definition of scope
Dimensions, quantity, material direction and project conditions are clarified.
03
Drawings and technical coordination
The design and workshop information are aligned.
04
Finish direction or samples
Copper patina or brass finish expectations are reviewed when necessary.
05
Approval
Required details are confirmed before production.
06
Fabrication
The approved piece or project package enters production.
07
Patina / finishing
The specified copper patina or brass surface finish is developed.
08
Quality review
Finished work is checked before packing.
09
Packaging
Pieces are protected according to scale, geometry and destination.
10
Shipping and delivery
The completed work moves to the project destination.
Each project may require a different sequence, but the principle remains the same:
Fabrication time begins after the information required to fabricate accurately has been resolved—not simply when the product is first discussed.
This matters particularly in hospitality projects where installation dates, general contractor schedules and opening dates can be difficult to move.
9. Choose a Fabricator Who Can Participate in the Design Process
A custom metal fabricator should provide more than production capacity.
For architecture and interior design teams, part of the value lies in having access to fabrication knowledge while the project is still being developed.
Useful capabilities include:
- reviewing feasibility;
- understanding custom geometry;
- interpreting drawings;
- discussing finishes;
- identifying fabrication constraints;
- coordinating repeated pieces;
- understanding packaging requirements;
- planning international delivery;
- communicating directly as details evolve.
WHY EARLY COLLABORATION MATTERS
A fabricator involved early can often identify a small adjustment while it is still a drawing.
A fabricator involved too late may only be able to identify the same issue once it has become:
- a fabrication problem;
- a cost increase;
- an installation conflict;
- or a schedule delay.
Working Directly With the Workshop
Monte Grande works with handcrafted copper and brass from its workshop in Santa Clara del Cobre, Mexico, developing both individual pieces and custom projects for residential, hospitality and commercial environments.
For designers and architects specifying copper, brass or both, direct communication with the workshop can be especially useful when the project involves:
custom dimensions, unusual geometries, repeated elements, copper patinas, brass finishes or large-scale surfaces.
Rather than treating the metal as a final decorative selection, the project can be reviewed as a fabrication problem from the beginning.
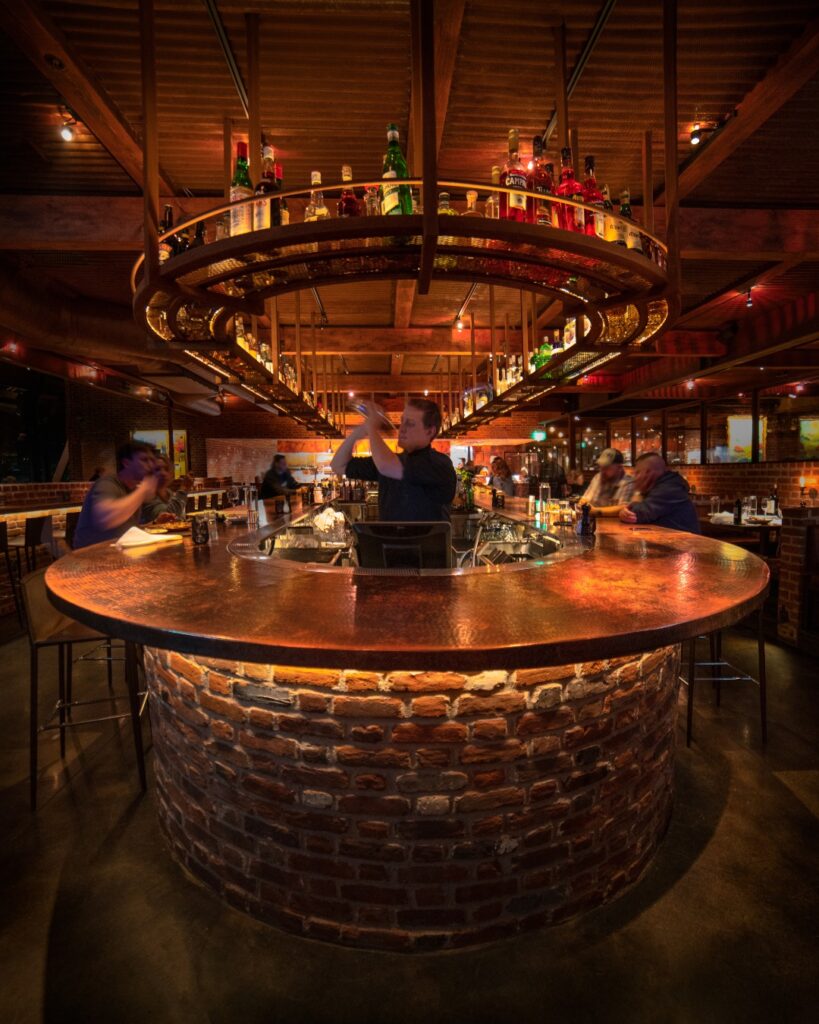
What to Send When Discussing a Project
You do not need every fabrication detail resolved before starting the conversation.
A useful initial package can include:
| Project information | What to send |
|---|---|
| Drawings | Architectural drawings, elevations, plans or details when available. |
| Dimensions | Overall dimensions and any critical constraints. |
| Reference images | Especially useful for finish, texture, edge or geometry direction. |
| Material preference | Copper, brass or a direction to evaluate. |
| Application | Bar, countertop, cladding, sink, table, furniture or architectural element. |
| Quantity | One piece or a repeated project package. |
| Finish direction | Patina, texture, living finish or protected surface. |
| Project location | Important for packaging and delivery planning. |
| Required timeline | Especially for commercial and hospitality projects. |
Custom Metalwork Works Best as a Collaboration
The strongest custom copper and brass projects are rarely created through a one-directional specification.
They develop through coordination between:
design intent + architectural conditions + material behavior + fabrication knowledge + installation reality.
For architects and interior designers, involving the fabricator early helps preserve the original concept while making sure the concept can actually be fabricated, transported and installed as intended.
Monte Grande can review project drawings, requirements and reference material directly with its workshop in Santa Clara del Cobre. Discuss a Project / Send Your Drawings.
